Blog Layout
OAuth 2.0 Authorisation with JWT Bearer Flow
Mike Arthur • May 08, 2020
In a server-to-server integration, there is no user to interactively log in to provide authorisation. In this case OAuth 2.0 JSON Web Token (JWT) bearer flow can provide the authorisation.
There are numerous online resources explaining how to set this up. I used a pinch from one and a sprinkle from another to arrive at a process that worked for me which I will share here. All of those sources will be referenced.
Ingredients
- A Salesforce Org
- OpenSSL
- Apex or Node or Python
- Postman
If you don't have all of those in your cupboard, don't worry, neither did I when I started.
Method
The first part is to generate a X.509 certificate. Most of the resources that I visited assumed that the reader already had OpenSSL installed, which I did not.
You can check if OpenSSL is installed from the command prompt (I'm using Windows throughout this):
> which openssl
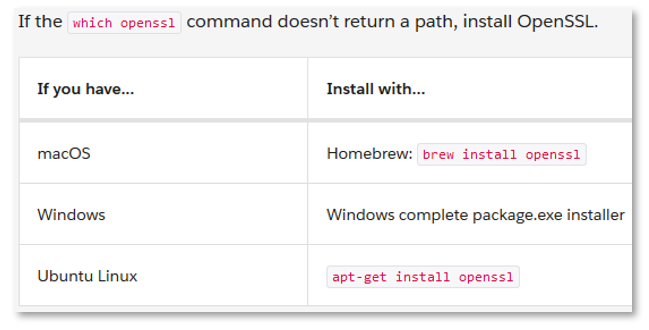
Installing OpenSSL on Windows looks pretty complex, and a DuckDuckGo
search returns lots of questions about errors encountered. However, a comment in a post on the community pointed out that the git installation for Windows includes OpenSSL, so you can access it from Git Bash. I already had this installed, so Thanks Kaushik Ghosh!
If you don't have OpenSSL or git on Windows, just install git, it looks much easier tha installing OpenSSL, and open the Git Bash application which gets installed.
Now we can generate the certificate, 'straight outta Trailhead':
• Create a new directory, e.g. cert, and switch to it.
> openssl genrsa -des3 -passout pass:SomePassword -out server.pass.key 2048
• Create a key file from the server.pass.key file:
> openssl rsa -passin pass:SomePassword -in server.pass.key -out server.key
• Delete the server.pass.key:
> rm server.pass.key
> rm server.pass.key
• Request and generate the certificate:
> openssl req -new -key server.key -out server.csr
• Enter all requested information.
• Generate the SSL certificate:
o Press Enter when prompted for the challenge password.
o The Certificate Authorities use this password to authenticate the certificate owner when they want to revoke their certificate. Because it’s a self-signed certificate, there’s no way to revoke it via CRL (Certificate Revocation List).
o Enter a period (.) to skip entering an optional company name.
> openssl x509 -req -sha256 -days 365 -in server.csr -signkey server.key -out server.crt
• In your directory, you will now find server.crt, server.csr and server.key.
Next we create a Connected App in Salesforce.
- Go to Setup, and then -
- Fill in the blanks like this, using your own details.
- ‘Callback URL’ can be anything.
- Make sure ‘Use digital signatures is checked’ and browse to ‘server.crt’ that was generated above.
- In Lightning, type 'app m' in Quick Find, click on 'App Manager' and click 'New Connected App' button at top right
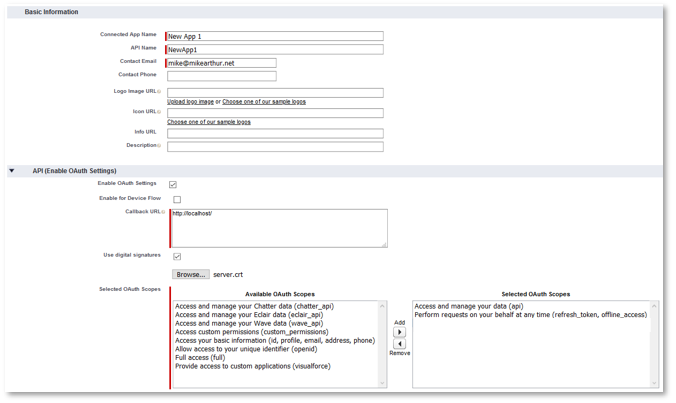
- Save your Connected app.
- Click ‘Manage’
- Under ‘OAuth Policies’ set ‘Permitted Users’ to ‘Admin approved users are pre-authorized’
- Save, and under ‘Profiles’, add a Profile, e.g. System Administrator
Now we can generate the token that will be used for authorisation.
I found various options online for performing this step using
I recommend having a look at each as there is a lot of useful information there. In my case, I had difficulty with the certificate format for the Apex one, and I’ve not used Node, so I went for Python which I have used a little. It's pretty easy to install and use.
If you don’t have Python, you can install it from here. - Run this command from command line to install needed extensions:
- The python code from booleangate's github page is shown at the foot of this page. Paste it into a new file and save it as ‘generate-token.py’. Put it in the same directory as the .crt and .key files.
- Modify these lines:-
IS_SANDBOX – True or False
KEY_FILE – the filename of your .key file. Include the path if not in the same directory
ISSUER – paste the consumer key from your connected app
SUBJECT – the username of the authenticating user
- At the command line make sure you are in the directory containing the .py, .crt and .key files, then issue
All being well you will receive a response like this:
PS C:\Users\Mike\cert> python generate-token.py
Loading private key...
Generating signed JWT assertion...
Making OAuth request...
Status: 200
{'access_token': '00DZ0000000cZFp!ARcThisIsNotARealToken5CeekNFm5o8pQfKVNlZoCmTo4mVWOPzR_WrMfbUAcQCH40cuc9rJm9XS4onzrEjhN7JIpAlXYRAGw', 'scope': 'api', 'instance_url': 'https://my-domain.my.salesforce.com', 'id': 'https://login.salesforce.com/id/00Dd0000000NotReal/005d0000000NotReal', 'token_type': 'Bearer'}
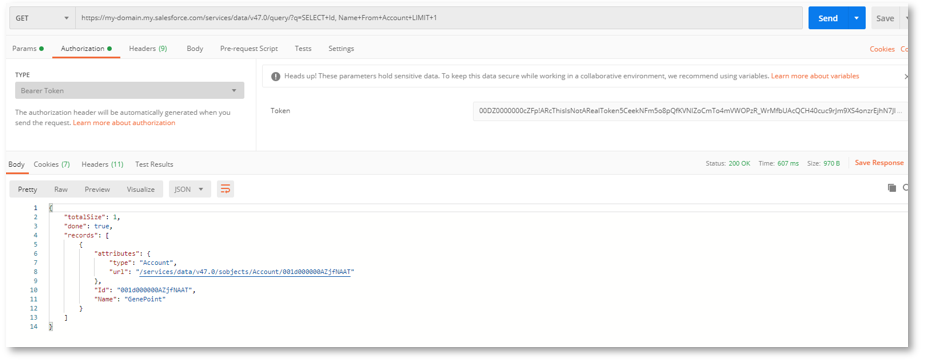
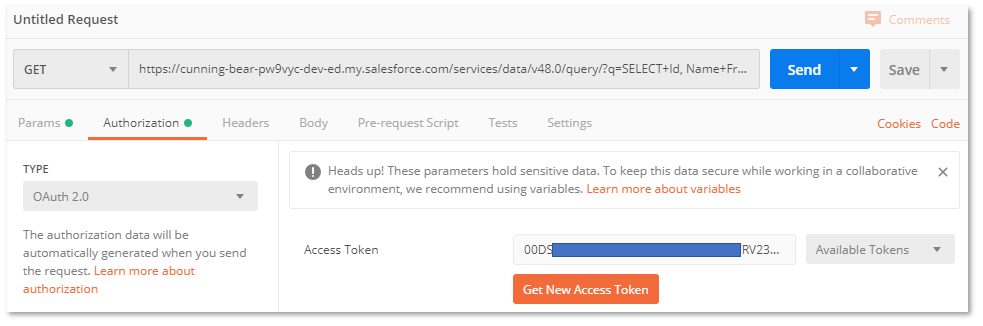
Copy the access token value, starting 00D…, without the quotes, and use it in Postman. Postman is a tool for developing and testing APIs and can be freely downloaded here. See this post
for an intro to Postman.
- Use this for a GET request:
- On the ‘Authorization’ tab, choose ‘Bearer Token’ as the ‘Type’ and paste the access token into the ‘Token’ field. Press ‘Send’ and you should see a JSON response:
Python code for generating JSON Web Token (from booleangate)
from datetime import datetime
import jwt
import time
import requests
# *** Update these values to match your configuration ***
IS_SANDBOX = True
KEY_FILE = 'salesforce.key'
ISSUER = 'the consumer key from your application'
SUBJECT = 'your-sf-user@email.tld'
# *******************************************************
DOMAIN = 'test' if IS_SANDBOX else 'login'
print('Loading private key...')
with open(KEY_FILE) as fd:
private_key = fd.read()
print('Generating signed JWT assertion...')
claim = {
'iss': ISSUER,
'exp': int(time.time()) + 300,
'aud': 'https://{}.salesforce.com'.format(DOMAIN),
'sub': SUBJECT,
}
assertion = jwt.encode(claim, private_key, algorithm='RS256', headers={'alg':'RS256'}).decode('utf8')
print('Making OAuth request...')
r = requests.post('https://{}.salesforce.com/services/oauth2/token'.format(DOMAIN), data = {
'grant_type': 'urn:ietf:params:oauth:grant-type:jwt-bearer',
'assertion': assertion,
})
print('Status:', r.status_code)
print(r.json())
My Blog of Salesforce Stuff
'XHR Failed' error when trying to install VS Code extension
What is $A (dollar A) in Lightning Aura component framework? Is it a global variable? Where are the docs for $A?
REST API Connection to Salesforce Connected App Using OAuth 2.0 Authentication from Postman

How to create a Lightning tab menu with dropdown sub-menu

How to show a month by month trend chart with multiple years on same chart
What to do if you receive emails about expiring certificates

Process json strings when working with integrations
If you're switching email accounts you can copy appointments from one calendar to the other
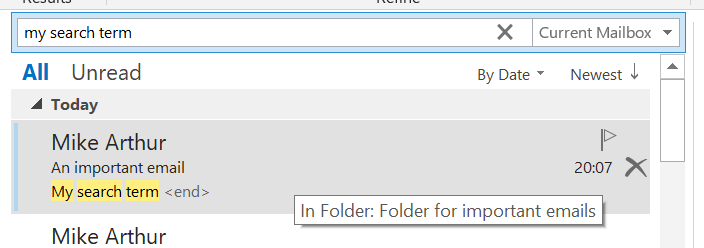
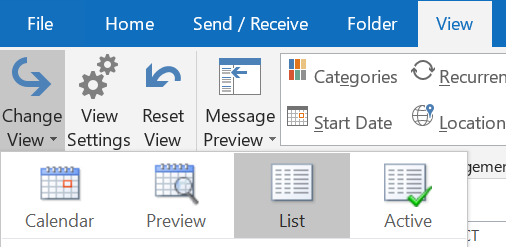
When you search in Outlook 2016, how do you see in which folder you filed an email in the results?
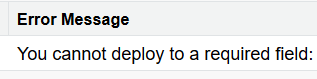
A change set or ant deployment will fail if a field that is required in the field definition is included in a profile or permission set that is being deployed